5LB Gunnar’s Diary

Turn 1 - It all began at Sandy Wharf
As well as my two companions that came with me from the North (Ivar and Erik), we have a Mystic (Dorothea), a Feral (Miyako), and a Preen (Spreet) and I feel I have found the right companions for this quest so today we travelled south into Nalar. First stop was the farming community near Sandy Wharf which we reached uneventfully but immediately started to hear about something strange the farmers have seen in the woods between the farms and the coast.There is nobody here we can recruit and it has cost us 2 Gold to stay at the only Inn, so before we move on Dorothea foraged for herbs and found two doses of Ironshield Root, while some of the team helped out around the local farms, earning back 1 Gold. We then set out to investigate the rumours we were hearing.
Turn 2 - Our first encounter with the Ice-Heart Court
The Ice-Heart Court is basically Elves, but I wanted to use my Narnian army so I think of it more like a mix of Fey beings, starting with Fauns. This was my first game, so the terrain a bit basic, but hey, it was all new (there’s a page taking about how this stuff was made if you are interested).
Turn 3 - As we were on our way to Freefield

Erik was the first to get to grips with the enemy but came off badly and would have likely been killed if not for Dorothea’s Heal spell. Preet got a good shot at the advancing minotaur and Ivar followed up and killed the beast, while I wounded two fauns
Turn 4 - A rest stop and a new companion
Turn 5 - Under Contract

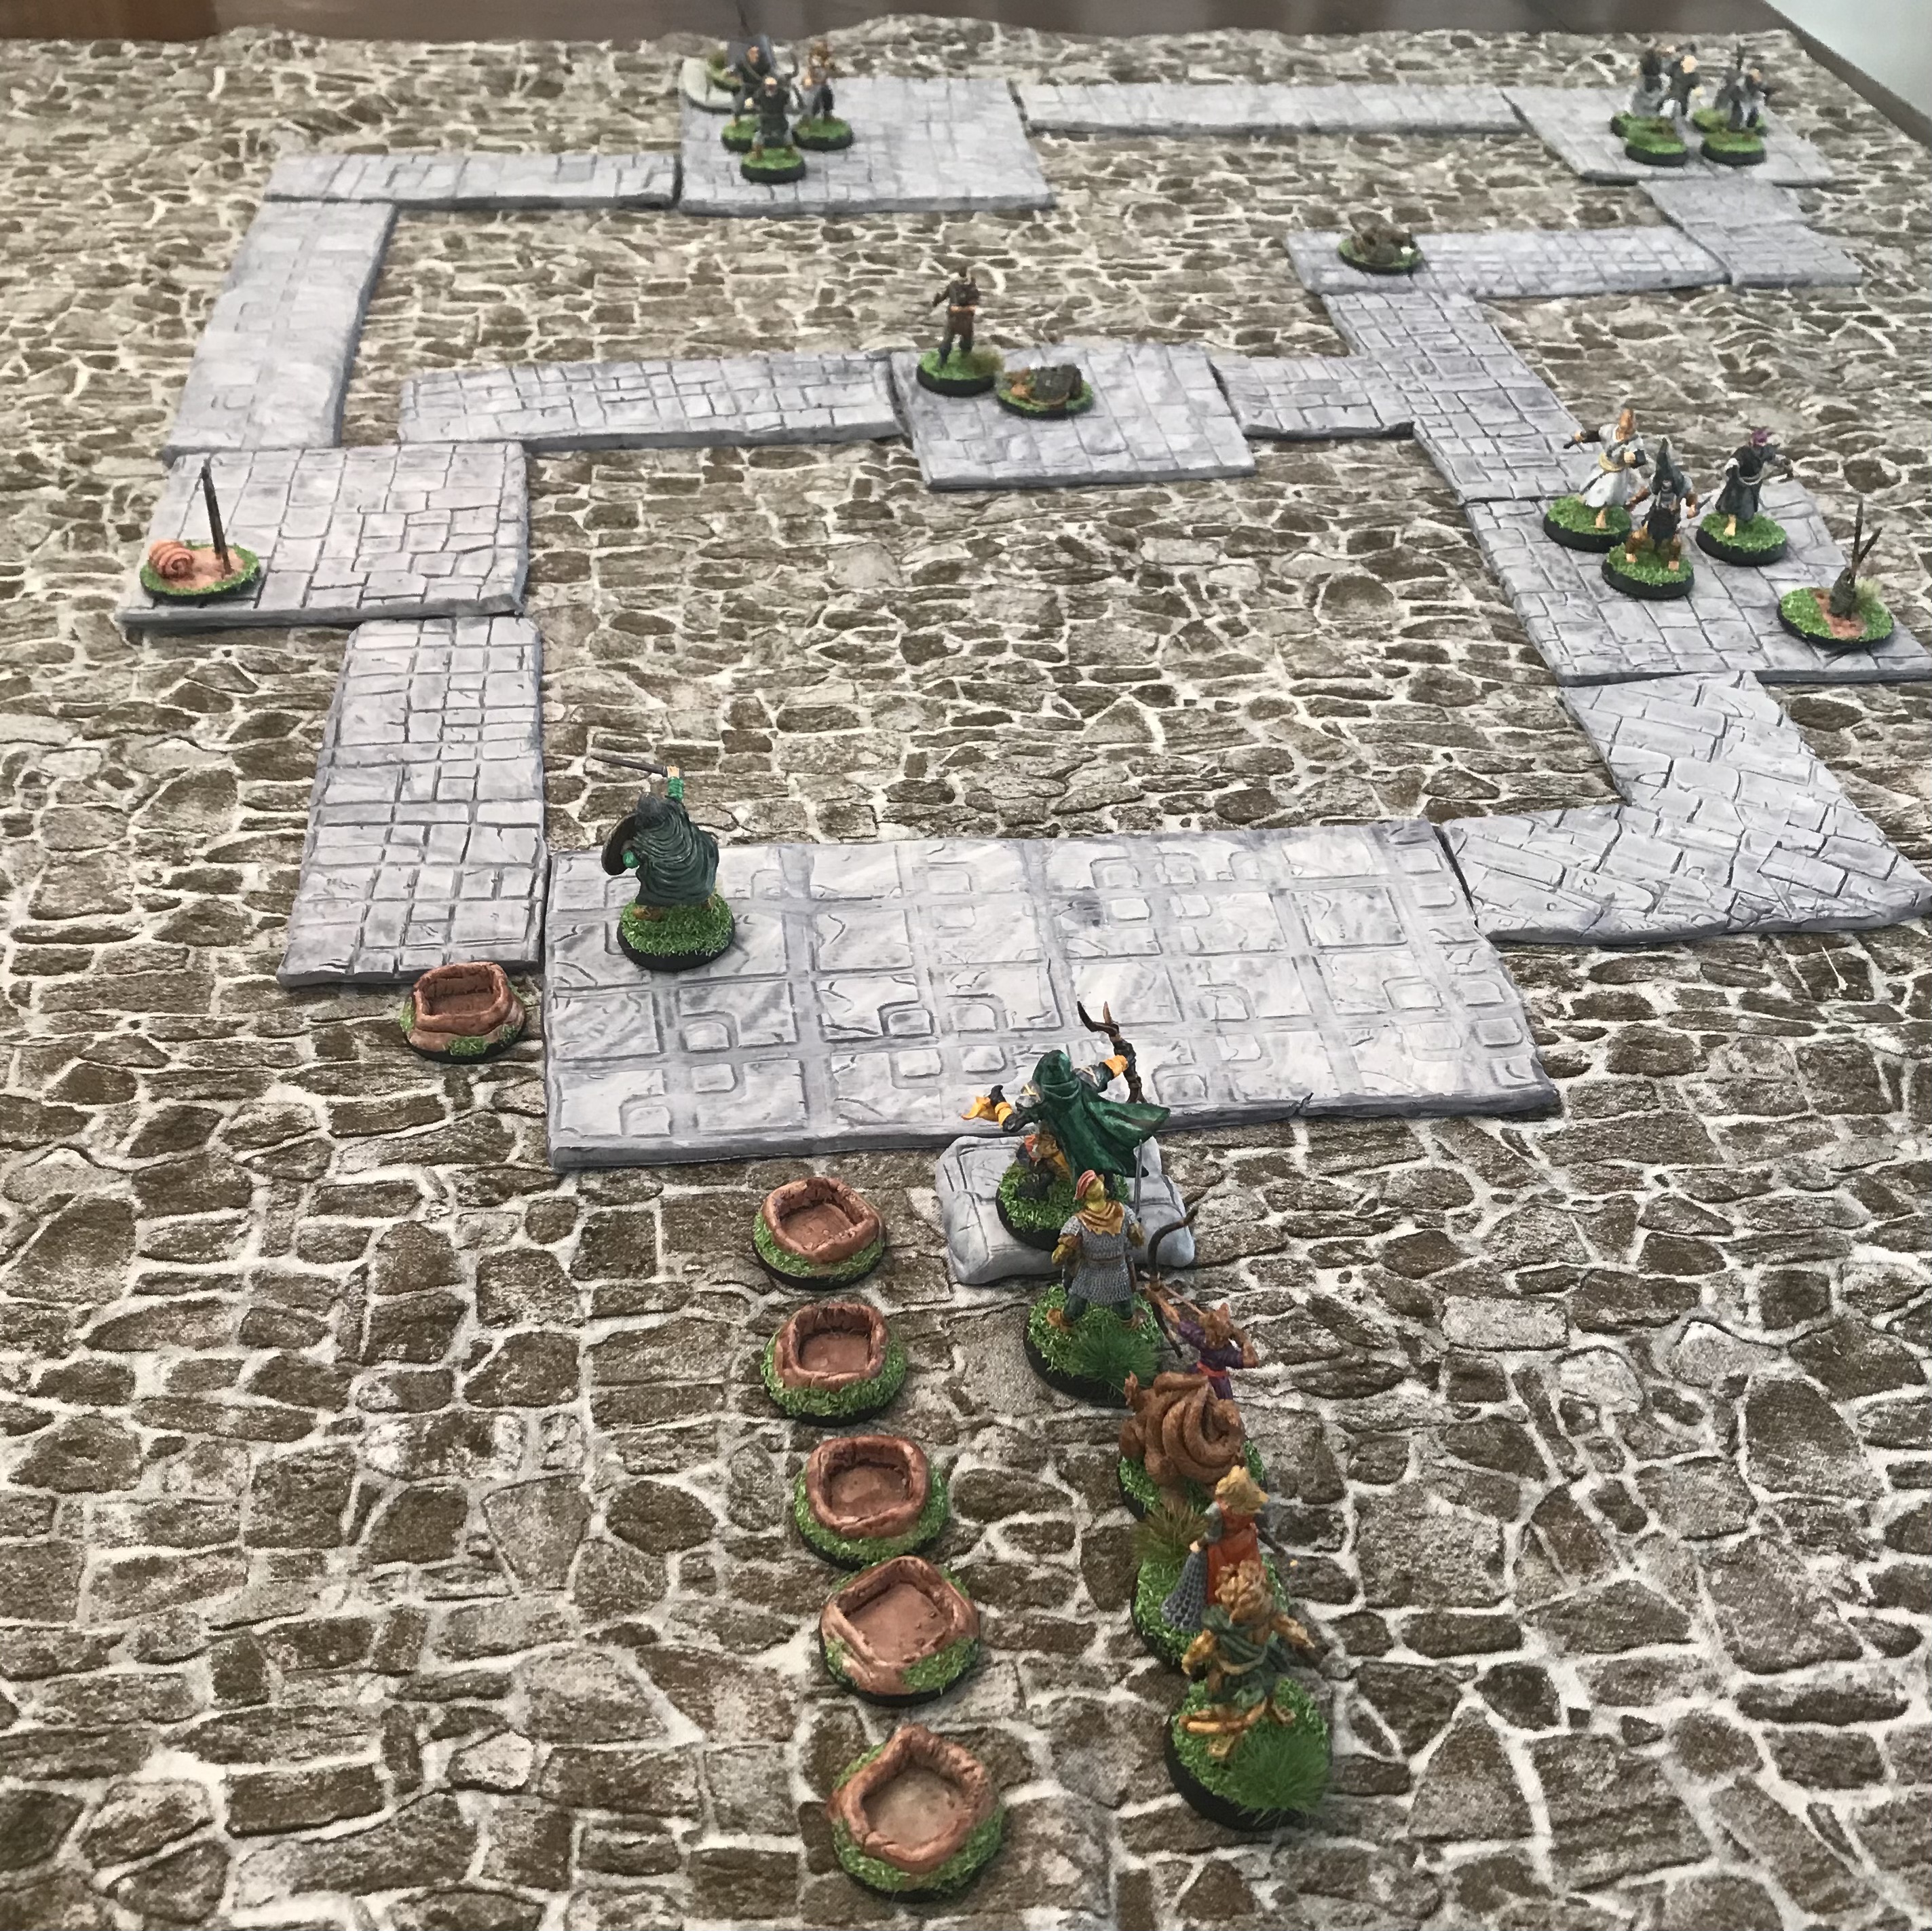
Miyako was the first to reach the cart and seeing three shambling forms coming up towards her, let fly, and the first enemy dropped to the ground. The enemy kept coming, three more burst through the trees on our left, another three on the right. Shambling monstrosities, no longer men. Preet shot and wounded one while I fought my way past the cart to kill one, but they showed no sign of faltering.
Next I faced off against one in monk’s robes, was this the novice we had come to find? Sadly I had no choice and plunged my sword into its chest. Miyago fired and then found herself out of ammo, but a quick spell by Dorothea and she was re-supplied. Leonidas and Erik had bided their time and now attacked, Leonidas killed his and then the other, but not before Erik took a wound. Miyako shot the last one and the battle was over so I could look over the contents of the cart.
Relics they said! This is treasure and worth much more that the five gold we were promised! But we escorted it back to town untouched, I’d rather have the monks on my side, and we had grave tidings to bear. I was right, on learning what we had seen, the Abbott gave us a Quest…

Turn 6 - The Abbott’s Quest, Part 1 The Thieves

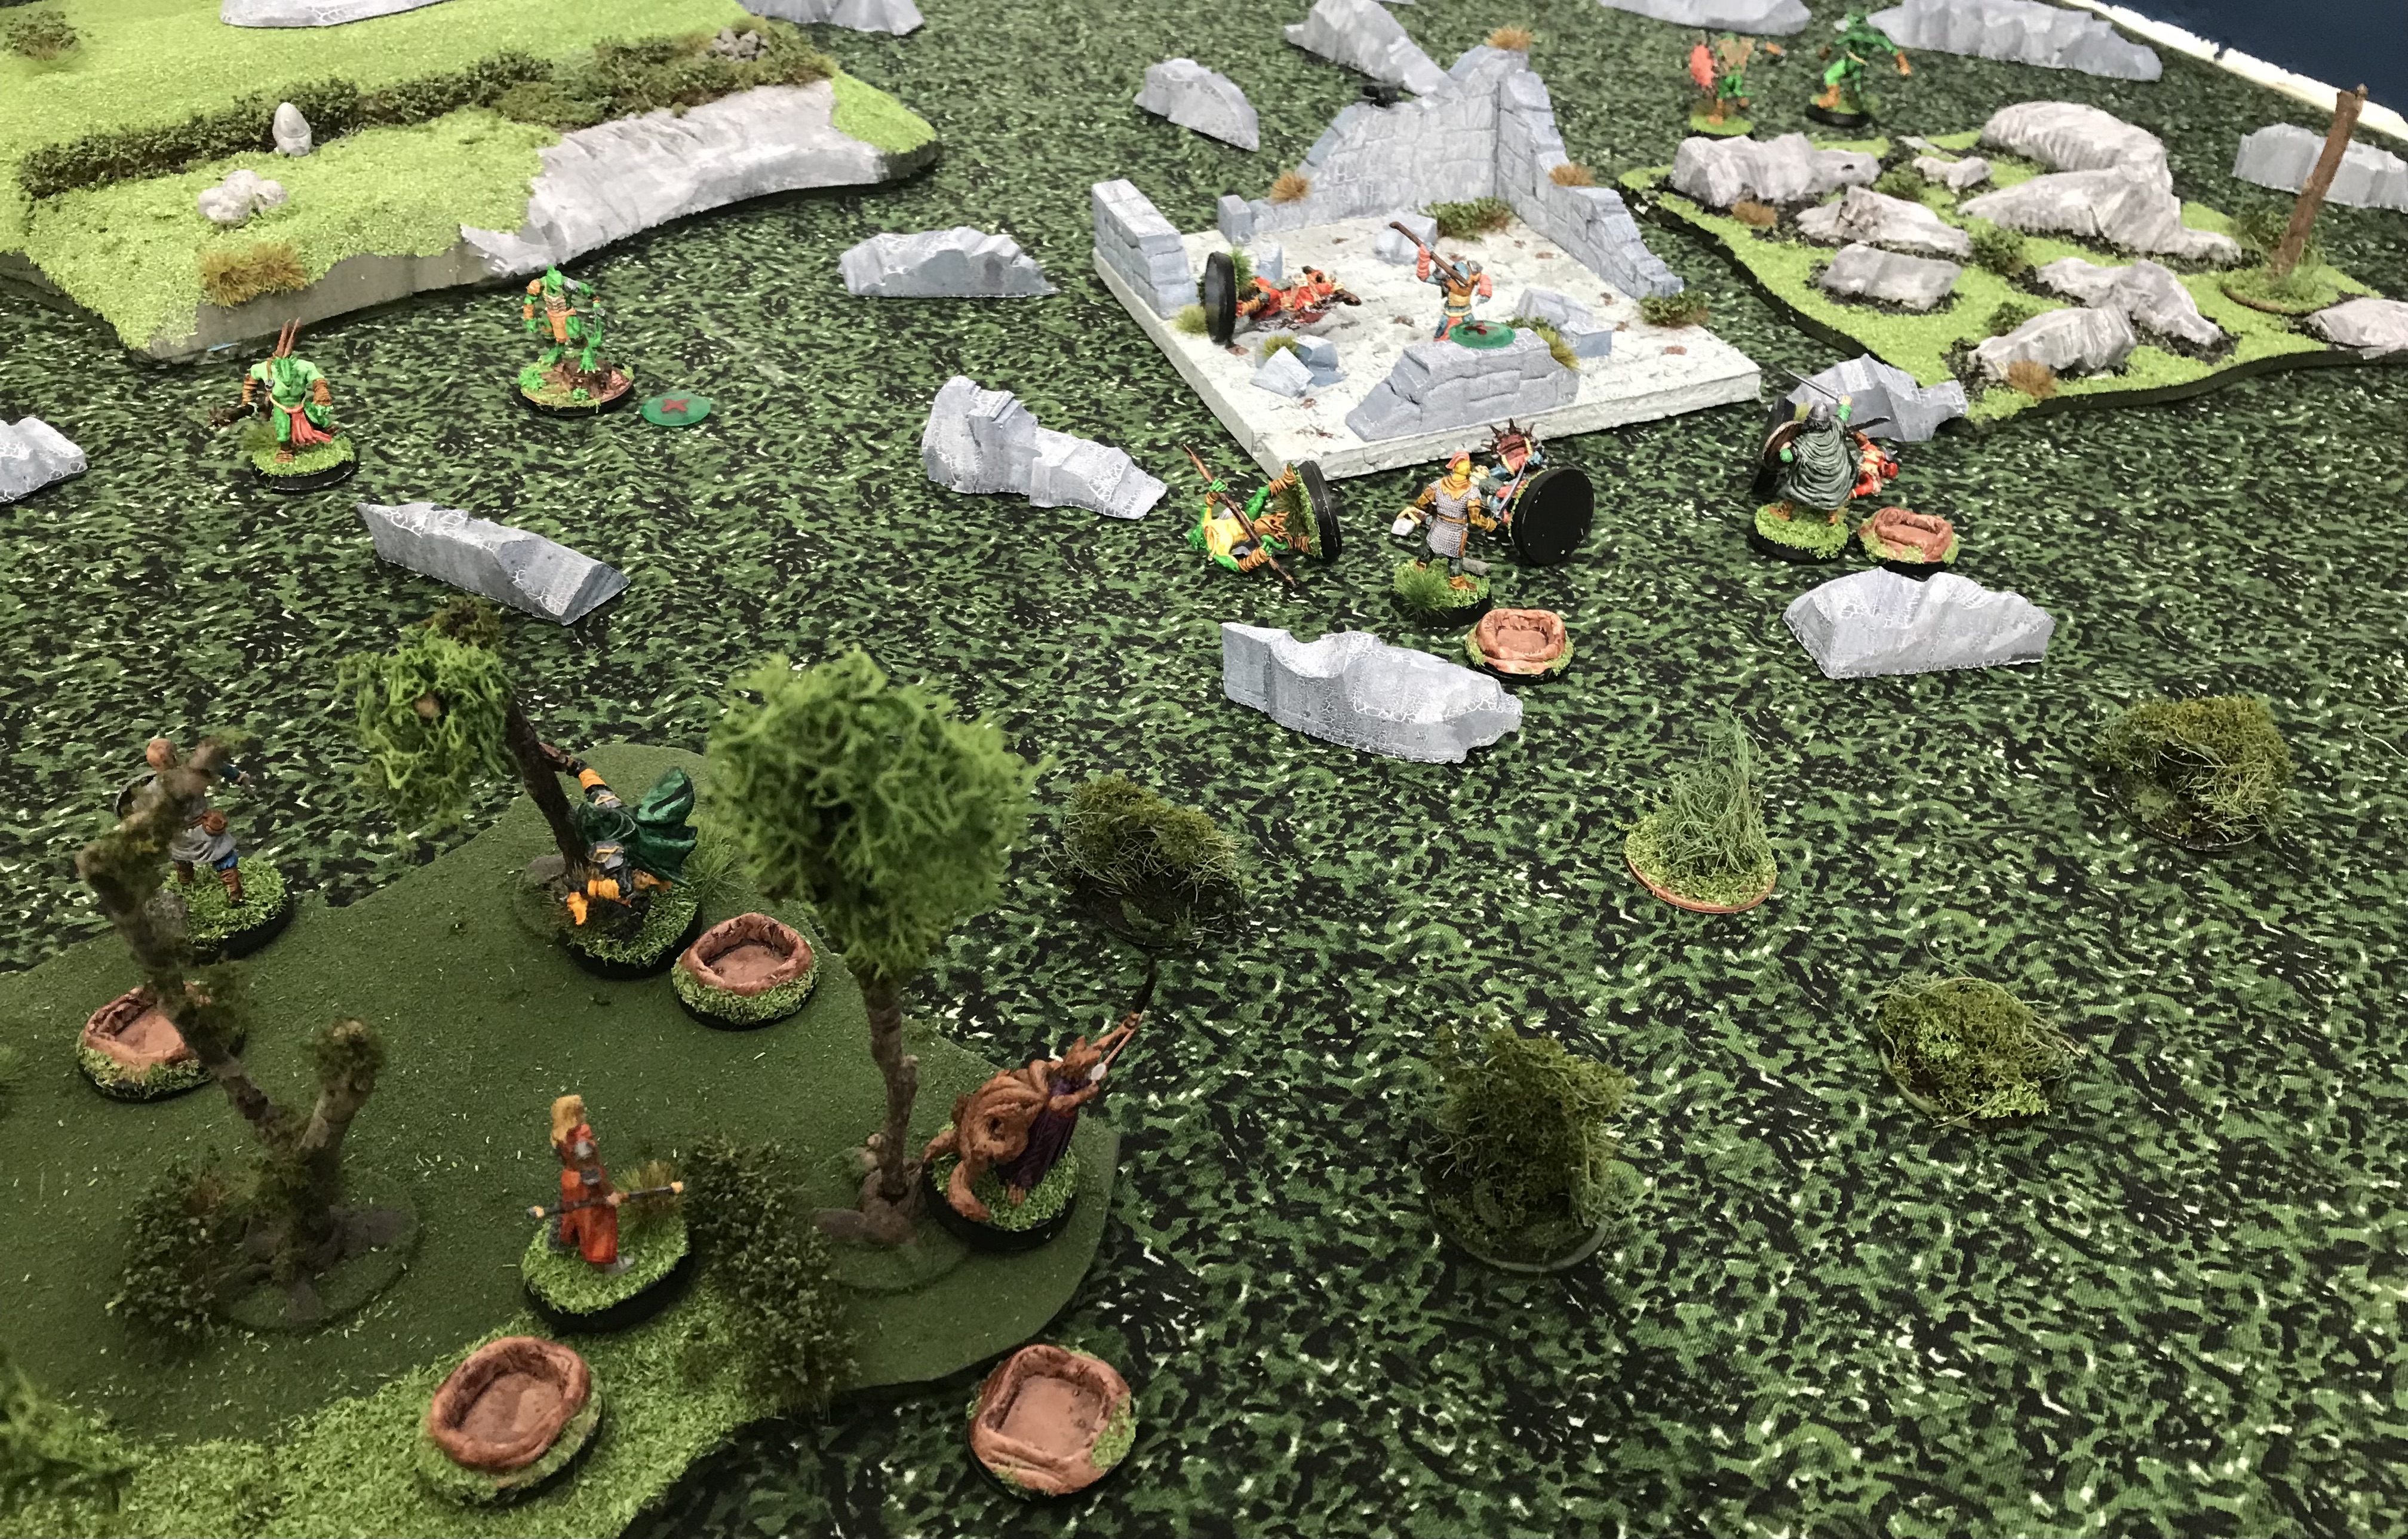
We made our way carefully through the rocky terrain, unable to see much in any direction, until three of the pillagers appeared around a corner in front of us and the battle was on. Miyako fired off a shot, taking down the man armed with a sling and we dispatched the other two in short order but the commotion drew others into the fray.
Things were going well until Ivar pushed his luck too far and charged ahead of the rest of us and was taken down. Miyako got a shot off, stopping that guy in his tracks, but Spreet was now angry and abandoning his bow charged at the foe blocking anyone else. Thankfully Spreet took down his target, but then round the next corner came a figure that made even me pause, a viscious looking warrior wrapped in furs, clearly a ruthless killer out for blood!

Spreet missed, so I closed in and managed to score a wound, but was soon in trouble and took a wound too, and it would have been worse if the Monks hadn’t blessed me before we left on the quest! With a final heroic effort I managed to push the foe back and give Miyako an opening for a killing shot, phew!
Meanwhile Dorothea and Leonidas reached the first objective, but it was not the relic and on hearing footsteps turned find another foe behind them, quickly dispatched by Leonidas. I located another but triggered a landslide, thankfully not blocking a direction we needed to go, and Spreet got to a third, finding a Scout’s Cloak.
Dorothea first thought the next area was empty, but after searching found a very well balanced Bastard Sword that she handed to me. I have to admit I love that sword. As she and Leonidas started to make their way back to the rest of us yet another enemy group appeared. There were three, but as soon as the first sprouted two arrows in his chest the others disappeared from view!
A cautious approach saved the day, as I made my way forward, the enemy slinger missed me and the other one leapt from hiding but my armour held off the attack, allowing me to then grab the initiative and force my way through the gap. Spreet shot and killed the Slinger, I killed my target and hopefully that was it.
Unfortunately the next area we searched unleashed a hidden trap, wounding Miyako, but then we did finally find the object of the quest. Poor Ivar will be out of action for many weeks and frankly I thought my own end had come when that berserker wrapped in furs appeared, and indeed I now have an impressive scar to help me remember the encounter! We settle in for the night before setting off back to Freefield, but as night falls we realise there is something strange in the woods nearby …”
Turn 7 - Whispers from Beyond
This is actually the second battle using the undead list (Turn 5 was the first) and the first appearance of the Cultists.
We managed to get into pretty good positions before the enemy realised, and as soon as they did spot us, Miyago shot one. Spreet missed though, and drew too much attention, and the returning crossbow bolt didn’t miss! I found myself in combat with a dangerous enemy agent, somewhat more skilled than the average cultist. A hard fought battle, I finally bested him, but in a counterattack with his last dying breath, he rendered me unconscious!
Turn 8 - The Abbott’s Quest, Part 2 The Slavers

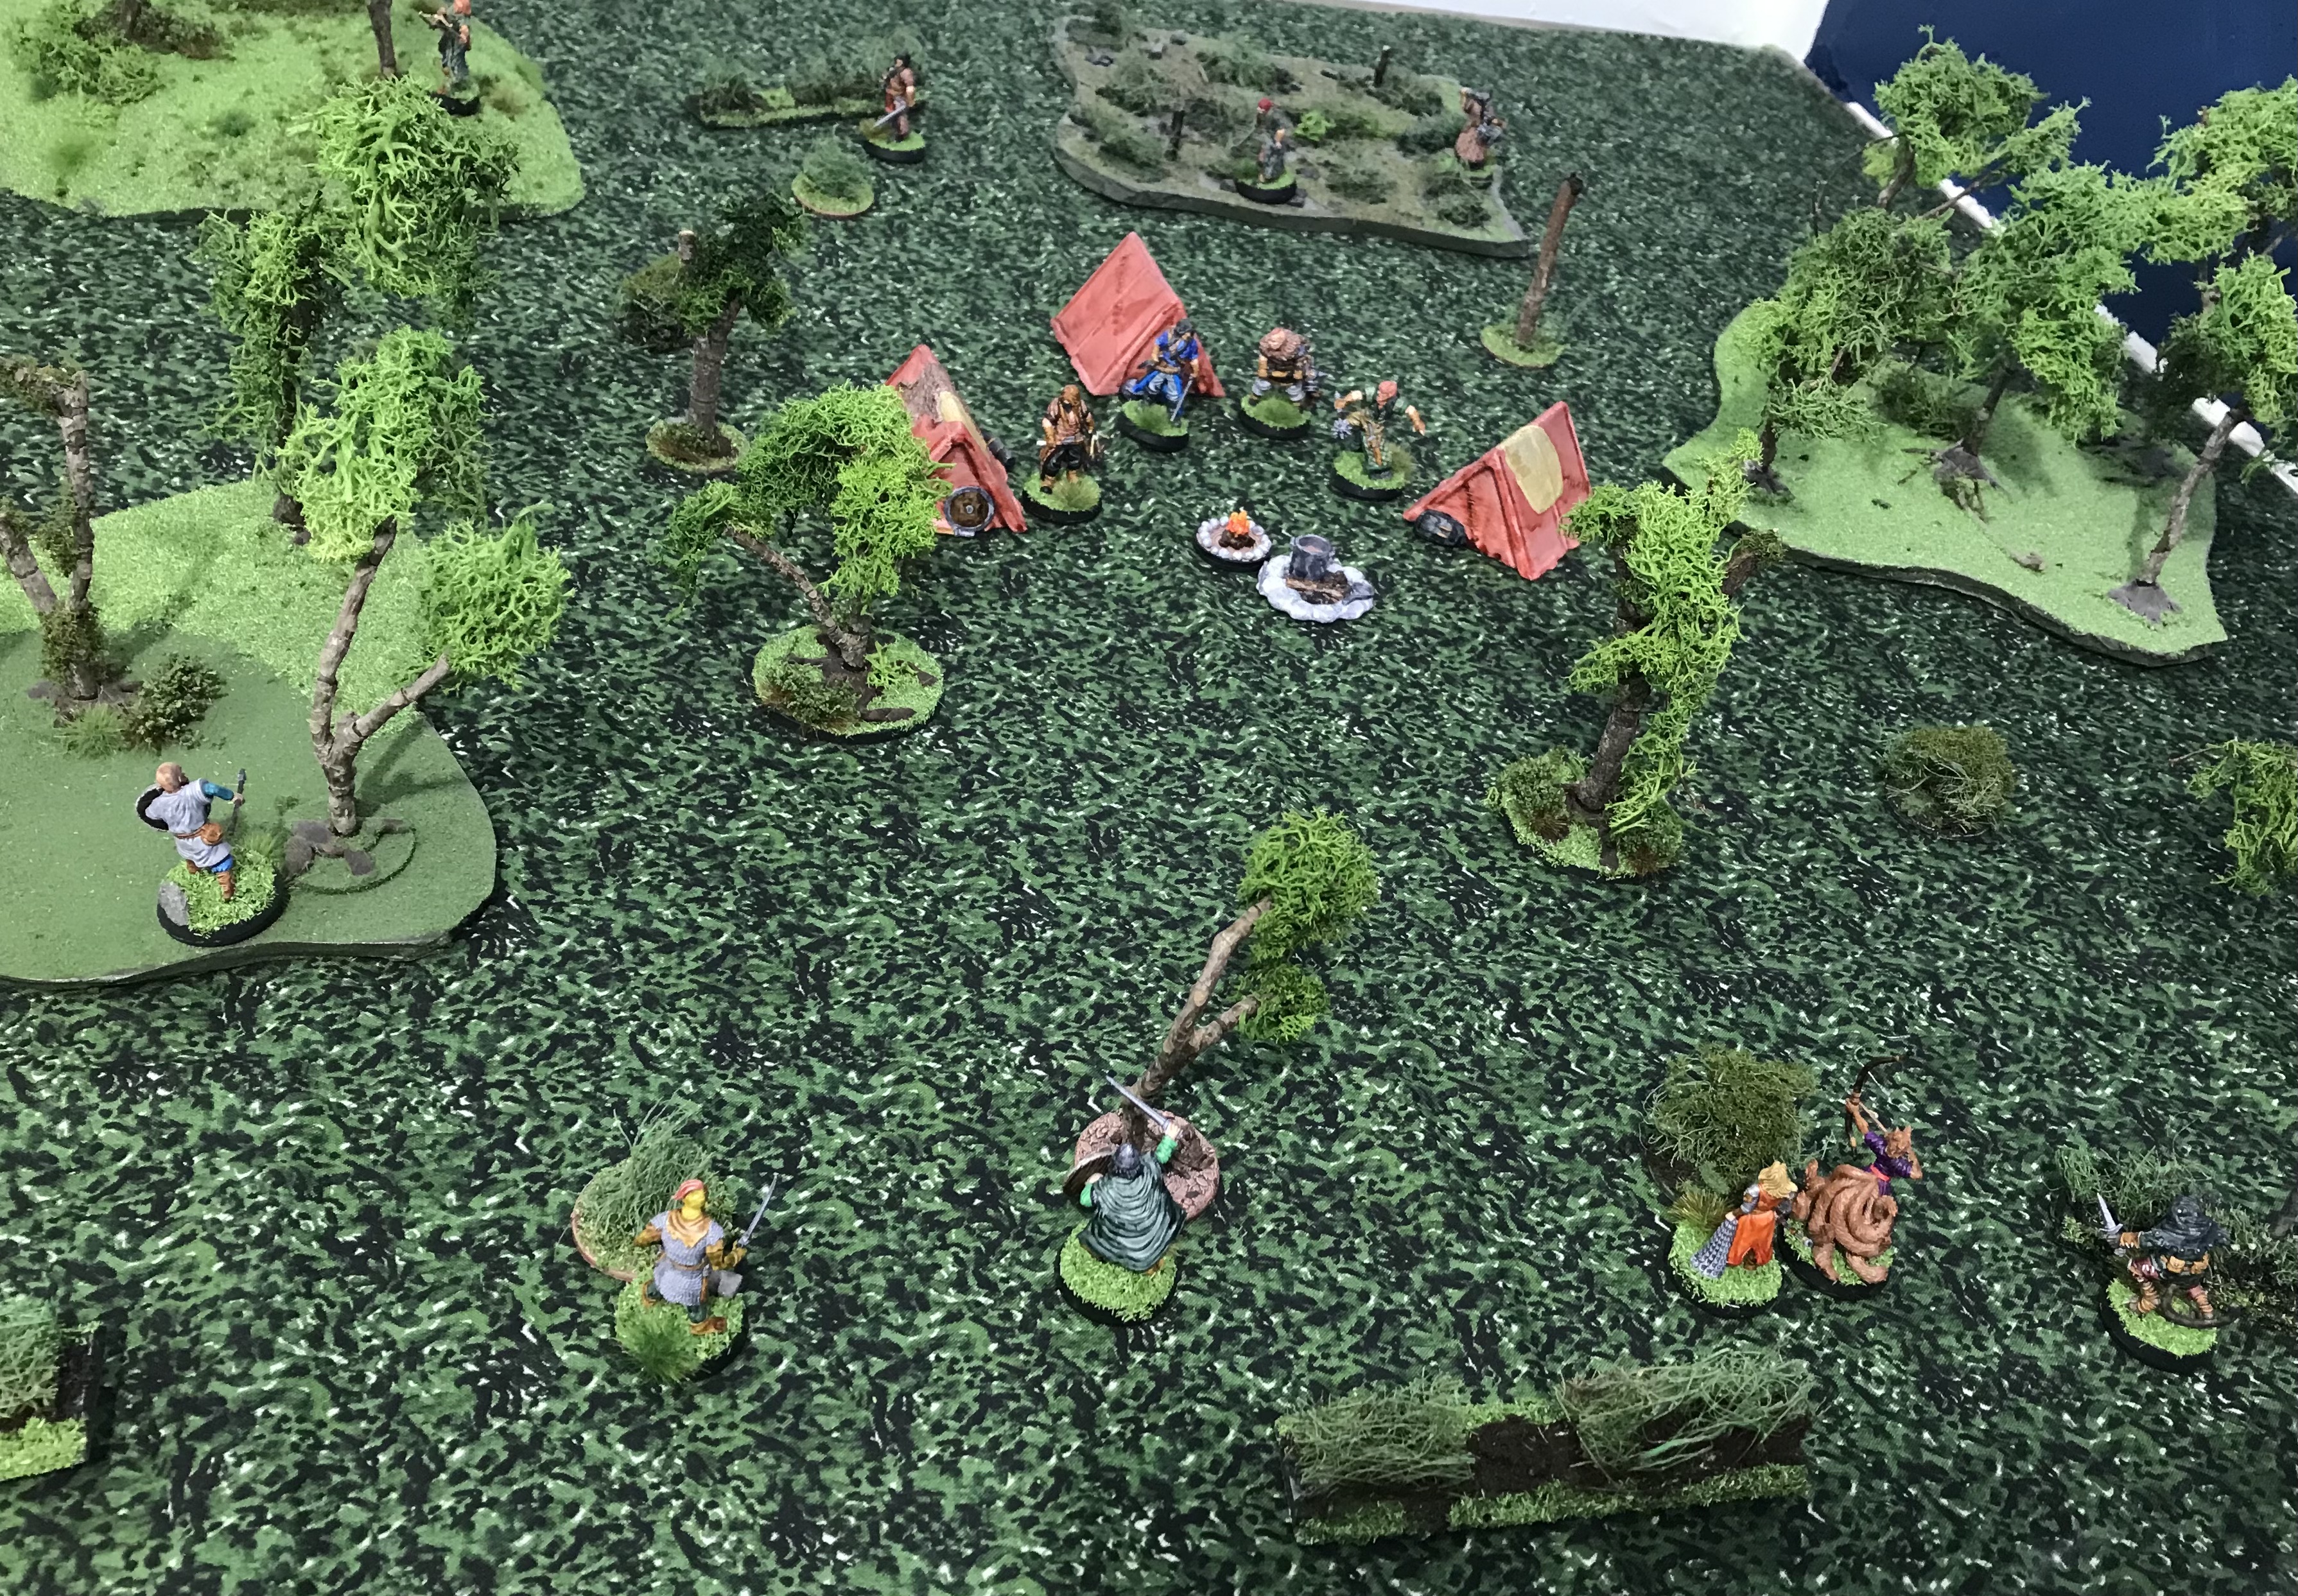
We get Ivar to a healer, and plan to spend time training, but then word reached us from the monks that one of their number has been captured by Slave Raiders nearby, and the next part of their quest is to rescue him. The slavers intended to make their way through the Dark Marshes, but had camped before moving too far in and that is where we came upon them. They were clearly preparing to move and some of their number were already scouting the best path through the marsh, we must hurry before our chance is
I still couldn’t kill the enemy leader but did manage to push him away from the captive, but now the slinger took out Erik and the last two slavers had made it back out of the marsh! Leonidas finally took out the slinger and Spreet shot another slaver, leaving just two on the field. Leonidas killed one, freeing the prisoner again, while I finally bested the leader. The day was ours!
Having rescued the captive, one Brother Marcus, and got him back to Frostfire safely, we install Erik at the same healer as Ivar, both will need a couple of weeks before they can rejoin us, at which point we will need to escort the monk back to his brethren in Freefield.
Turn 9 - Undead Hideout

We approached the enemy’s hideout, until one of them spotted Leonidas and raised the alarm. We started to juggle for position, but Grak got himself into trouble and was lucky to only take a wound. I am busy dispatching a cultist and can’t help.
Knowing Leonidas is coming to help, Grak dives back in and kills a cultist, then Leonidas kills another. The third cultist on that flank attacks Leonidas but doesn’t land a hit. Now though Dorothea is in trouble, the leader of the cultists is in fact a Scheming Heretic who Charms her into inactivity, and a cultist then charges in!
Thankfully the cultist fails to do any damage and before he can try again I cut him down from behind. Meanwhile Miyako realising the threat, manages a clear shot on the Heretic and down he goes! The cultists keep going though and their one bowman finally manages a shot, wounding me! Spreet shoots another cultist, but the other one on the right is a harder task, both Leonidas and Grak try to take him out, Leonidas picks up a wound and Grak goes down! To make matter worse, Dorothea successfully heals my wound, but the scent of the magic attracts a pack of lurking giant rats! Miyako does well to take out the Cult Lieutenant before he can do any further harm. The last cultist is the bowman, he tries for me again, but the arrow doesn’t penetrate my chainmail this time, and then Spreet takes him down. That should be that, but of course now we have the rats to deal with. Dorothea is forced into hand-to-hand combat, but soon is on the defensive, but I wade in and my trusty Bastard Sword is soon coated in rat blood, as I kill 4!. Leonidas has bandaged himself up, and accounts for two rats, Miyako gets one, Dorothea gets in a lucky blow with her staff, and the threat is easily dealt with.
We arrived back in Frostfire Ford with a grand tale to tell! The cult threat has been dealt with, Grak was only wounded, the death of the Scheming Heretic was a welcome bonus, and we came away with some gold coins and a War Axe for Leonidas. Tomorrow, we will escort Brother Marcus back to Freefield.
Turn 10 - Escort duty and first appearance of The Cold Ones

First round all archers missed while the melee troops got ready to fight, and the second round also saw ineffective archery as the foe made good use of the available rocky cover. That however was no defence against my sword and I dealt with the archer and saw off an attack from another lizard. Theses lizards proved to be quite resilient though and my opponent also survived an attack by Erik, while Leonidas took a wound. They couldn’t hold out for long though as I did take out my enemy, while Leonidas stunned his and Erik finished him off. Before we could celebrate though, Miyako alerted us to more foe coming through.
Wary of the enemy archer, Dorothea cast Distract and both Spreet and Miyako decided they had better get closer before trying again! Leonidas couldn’t wait to see if they could hit anything at last though and charged into the archer, neatly removing its head with his new War Axe! Then. Miyako finally got a shot on true, admittedly at close range in the open, and downed the enemy leader. The battle was over, we could continue on our way.
Turn 11 - Attacked again, what a journey!

However, it seems that first we would have to deal with some fools who wanted to rob us! They got quite close before Spreet spotted movement in the trees and sounded the alarm, but we soon dealt with the fools and only two survived to run away. Leonidas took a slight wound and we thought we’d lost Grak but he was only knocked unconscious. It should be said that he doesn’t seem to have much head for battle!
Eventually we made Freefield, said goodbye to Brother Marcus, and prepared to go Monster Hunting.
Turn 12 - Ogre Hunt

We arrived back in Freefield with the Monster’s head, and during the merriment that evening we learnt of yet more attacks by strange Fey creatures and sighting of a possible camp in the forest.
Turn 13 - Goblins!
This next game was originally going to be another simple Camp Raid, but I realised the Story Points were stacking up and the Quest was a bit of a distraction from the main aim of clearing down Enemy Threats, so a plot was hatched to have a series of games against the Fey threat. Game 13 became a Meeting Engagement against Goblin Raiders but that meant they had Outflanking on their side and then Lady Chance also threw Unknown Enemy into the mix, so the 9 goblins became 4 in view, an unknown counter that resolved to another 4, and a final group of 4 more turning up later!
Spreet and Miyako let fly and the battle was on. Three goblins down in the first round, another four in the second, and the last one was running away, things looked good. Then we realised that Grak was down and more goblins were on the way!
The goblins spotted Leonidas apparently all on his own and rushed towards him, but our battle scared Feral knew better than to take on those odds and waited for the enemy to come to him, while the rest of us rushed to his aid. Our archers did well, downing two, and Leo using a bush for cover got in a counterattack that dealt with a third, and the last one turned tail and fled.
We could take no joy in this victory however as we found to our dismay that Grak was dead! We vowed there and then to put an end to these Fey intruders!
Turn 14 - The Lynx Effect

The first beast to get close was shot by Miyako but the rest kept coming. Then as we braced to meet their charge, yet another four appeared on our right, lead by one appearing to be wearing armour! We couldn’t wait for the first group to hit us, we had to charge into them.
It was a hard fought battle, with even Dorothea and Spreet reduced to hand-to-claw fighting, but I eventually took down the armoured beast and we could count our wounds. Leo had an impressive scar even after Dorothea healed him, Spreet needed a bandage, and although Erik went down in the battle he wasn’t badly hurt and his broken spear was repairable.
Turn 15 - The Enemy Camp
There are no cavalry in the 5LB rules and in fact the list for the Fey has some dismounted knights, but I have these Centaur minis already so …
Spreet took an arrow early on, but Dorothea healed him. The enemy closed in fast and both myself and Leonidas got stuck into hand-to-hand combat while the archers took out the enemy archers, but the final centaur galloped off into the forest, no doubt to warn his friends.
When we reached where they had camped we found a clue as to where the enemy leaders had a their hideout deeper within the woods.
Turn 16 - The Trees are moving!

These devils were tough and it seemed we would never take them all down, but eventually we were faced by nothing but normal trees, though I fear that once again that one of them got away to raise a warning, we would need to be careful. Both Erik and Ivar went down in the battle, thankfully neither died and in fact Ivar was only stunned, but Erik had broken his arm and was sent back to town to recover.
Turn 17 - The end of the Fey threat

This was indeed our hardest battle yet and at the point where three of my comrades were on the ground I figured we had bitten off more than we could chew. My personal duel with the Fey leader lasted for three turns, but finally I, and we, were victorious!
When I came to tally the cost, I found Dorothea with a minor wound, Ivar had been stunned (again!), and Spreet had a very lucky escape. The gods were clearly smiling on us, and the Waybrook Forest seemed somehow more at peace as we travelled through it back to Freefield.
Turn 18 - Waylaid

However, I don’t think they were at all prepared for the likes of us and we made short work of them! Thankfully Graug proved to be more of a Warrior than his poor clansman.
Turn 19 - Arrival in Skypool
Turn 20 - The Abbott’s Quest, Part 3 The Faceless

These warriors were tough, Leonidas took a cut and Miyako took a crossbow bolt, but we were victorious and very happy to find the farmer and his family held inside their home, who told us they had been forced to keep faming and to feed the enemy when they returned from scouting around Skypool. A successful end to another part of our quest then.
Interlude

Turn 21 - Contract to slay the Werewolf

Arriving back at Skypool, we spent the evening in a tavern, and were sitting happily celebrating when a small group of locals approached our table. It seems that word was starting to get around about us, perhaps due to that Bard we met some time back?
The locals told us they needed to travel through Dragon Woodland to get to Frostfireford tomorrow night, but that would mean being in the woods during a full moon and they were scared of a Werewolf lurking in said woods. They pleaded with us to set out that night and slay the beast.
There were three possible locations for the beast’s lair. The first turned up a stash of clothing, armour and weapons, clearly taken from the Werewolf’s victims. There was no doubt we were in the right area.
As I approached the second location, a stand of five trees, the damned thing came hurtling towards me! Thankfully I fended off it’s first attack and I proceeded to try and hold it off until the rest of the team could reach us. This needed some fancy footwork, the use of my shield, and not pushing my luck when I did wound it.

Eventually the rest got into range, Miyako managed to get an arrow into it but it seemed to ignore it! I drove it back but it just redoubled its efforts, raking its claws across my chainmail just infuriated it, and it poured all its bestial might into the next attack, damn near taking my leg off. I fell to the ground and prepared to die.
However, Dorothea conjured her Leopard familiar which leapt into the fray and distracted the beast and gave Leonidas and Graug time to prepare a pincer attack. Graug was ineffectual, but Leonidas gave it another wound, while the Leopard made itself a target for the beast. The archers and Dorothea could only look on as their own team mates were now in the way.

The beast was hard pressed and thankfully couldn’t recover from its wounds, it wounded and stunned Leonidas but that gave Graug another opportunity to wound it again. The beast counter attacked and forced him back, but that opened up the opportunity the two archers had been waiting for. Two more arrows hit home, but again didn’t seem to even slow the beast down! They must have distracted it though as Graug seized his opportunity and struck a final mighty blow, finally dropping the beast at his feet!

Turn 22 - Facing the Undead

Word reached me of a group of undead moving through the foothills seemingly towards Skypool, and I felt it was time to find out what is behind these incursions. As we approached we could clearly see two groups of skeletons plus vague signs of movement. The two sides warily approached each other, the skeletons shambling slowly, until our archers could start to fire, but both of them saw their first hits just bounce off the bones and I realised that this may be more of a challenge than first expected. Then Leonidas got close enough to work out what the movement was, and this was clearly going to turn into a gruelling battle, with no quarter asked or given.

I called the team to attack the now larger group in the centre, in the hope they could be dispatched before the other group could join them. Leonidas was first to engage and was delighted to fell one with his first blow. I took on their leader, which parried my first strike with it’s shield but the second cut straight through it. Another foe then challenged me, but was no trouble. Graug faired less well as a Skeleton managed to wound him before he could push it back, and I could not help him as I faced a third Skeleton and whittled it down, only to be faced by a fourth who I had to parry with my shield before it too was down.

The hand-to-hand combat raged on. Leonidas took out the last enemy on the left and I ploughed into one of the last group, force the remaining three to split their attack between myself and Graug. Spreet got a solid hit on one but again saw his arrow have no effect at all, but Miyako faired better, downing one that had been heading towards Graug, just as well as the other was proving hard to beat.

I then dispatched another though and Graug finally dealt with his, and the battle was done.
Turn 23 - Going down!

We were right to suspect someone was living down here, I soon came upon a stash of travelling cloaks and boots near the entrance that included five gold coins, clearly the inhabitants were not expecting visitors! Just as I finished looting the stash I heard voices approaching.

In no mood to play hide-and-seek, I let myself be seen but held back so the others could reach me, with our archers watching our backs. They carried on advancing cautiously though as if sensing I was waiting for them much too calmly, and I was still trying to decide whether I could lure them right into the room, when a shout went up from Spreet, more enemies had appeared behind us!

The foe were clearly more at home here than us and seemed to be gaining the upper hand. Leonidas went uo to support Graug, and Dorethea went back to check on the two archers, which left me stuck in a corridor alone … but not alone! Unknown to us, someone else had been wandering about the dungeon looking for easy pickings, but now with a full blown battle ranging he was looking for an easy out, and my unprotected back seemed like an easy target.

I hastily parried his first blow, and pushed him back a bit, the other fight was now behind me and I heard Graug gasp as he took a wound, but I now took the fight to the crafty thief and scored a wound on him as I continued to push him back, and behind me it sounded like Graug was victorious. Meanwhile, two nasty looking cultists continued to menace Spreet and Miyako, but they got one more shot off and downed them both, phew!

It was then that Dorothea made a near fatal mistake. Realising that our archers were no longer in trouble, she turned back towards me, coming face-to-face with the thief who realising I was no pushover had decided to make a break for the exit. Expecting to see me, Dorothea was complete unprepared for the sneaky dagger to the gut as he rushed past.

Trusting the team to deal with anything this place had left to throw at us, we went our seperate ways.

Leonidas found a interesting section of floor that looked like something had been hidden there but was not there anymore (we later found a bag of gems on the thief’s body). Spreet and I met up and continued together, which was lucky because when we found a collapsed area later, he was the one who found passage through.

After what had happened to Dorothea, we were in no mood to look favourably on them, and they were no match for the four of us. We dug through their stash and found a chainmail surcoat that gave off a faint glow in the torchlight, later finding it had curative effects during battles.
Turn 24 - The Abbott’s Quest, Part 4 The Manticore
The new supplement, Paths in the Wilderness, was released this week and includes a Sea Travel table, so I moved the next part of the Monk’s Quest over to the island that was always sat there on the map enticingly. I was also taken by the new Roaming Aberrations section to change up how the Ingredient Search scenario played out.

We got Dorothea safely back to Skybloom and took her to the local chapter of the monks who we have been doing quests for. They were eager to help, indeed if anything a little too eager, and we soon found out why, when the Abbott came to see us.
To the East of Nalar Point is an island called Hotbloom, home to just a single small fishing village centred around a monastery. The monastery is home to a different brotherhood who apparently don’t take kindly to the Abbott due to some incident in the past he carefully skirted over. Recently though it has come to the Abbott’s attention that the island is also home to Afelthane, a very rare plant said to cure ailments of the mind. In return for tending to poor Dorothea, the Abbott asks that we travel to Hotbloom and retrieve some.
We leave the next day on a ship that frequently trades with the fishermen on Hotbloom. The Abbott pays the fare and the journey passing without incident, though Spreet is sure he saw a black sail disappearing round the east coast of the island as we pulled into the harbour.
The monks of Hotbloom do not seem at all antagonistic and I begin to wonder what the Abbott did to them, but when we discretely enquire about Afelthane they also seem way too eager to set us on the track to a ruin near the centre of the island. We arrive without incident and start looking around but then Miyako spots a huge beast lumbering through the trees! With the body of a lion, wings of a bat, and a wickedly spiked tail like a scorpion, it appears we have somehow stumbled across a Manticore!
The team and I were positioning ourselves to meet the beast when it fires out some sort of spine, that penetrates Ivar’s armour without trouble! Miyako is well placed to get off a shot and I am glad to see her arrow sink into the shoulder of the beast, but it keeps coming.

Spreet is next to land an arrow, also drawing blood, but not stopping it. Leonidas, Graug, and I close on the beast and it lets out a mighty below and heads straight for me! I fight back and get the upper hand, but my first hit doesn’t penetrate it’s tough hide. My next blow does connect, causing the beast to lash it’s barbed tail and forcing me to retreat. Miyako can no longer shoot without hitting us and goes to bandage Ivar’s wound.

Leonidas goes in next though and one swing of his trusty war axe does the job. The beast is down.
A thorough search of the area did turn up some Afelthane, which now that I was absolutely sure the brotherhood had sent us to meet our deaths, I did not disclose to the monks. Rejecting the offer to stay for another night, we headed back to the harbour and set sail immediately.
Turn 25 - Pirates!


Turn 26 - Down, down

Thankfully, by being distracted by digging through the finds and deciding to let the others catch up, I was still enough to hear a sound like wings beating and looked down the corridor to see three bright blue flying creatures turning the corner.

Should I back up and draw them into the room so that the others can join the fight? Hell no! In I went and hacked one out of the air, and Miyako and Ivar could only stand by and watch, and wonder if the sound of the fight was going to bring more of the beasts. The imps tried to fight, but I quickly dispatched all three which also put me in position to see further down the central corridor and not just more flying beasts but something even stranger!

I waded in again but only wounded an imp, this does however keep the enemy distracted as I could see team with Leonidas appear behind the enemy. Spreet gets a shot off against the Infernal Spawn, but misses, drawing its attention and it attacks him, Spreet goes down! This riled me somewhat, spurring me to quickly deal with the three imps.
The Spawn seems to mutate before my eyes! Leonidas takes it on but is no match for it and goes down! Graug has a go, wounds it and pushes it back enough that I can attack from the other side. The melee goes back-and-forth with neither of us getting the upper hand. Miyako is poised hoping to get a shot off, while Ivar guards her back. The Spawn continues the battle and again it’s a stalemate.

The Spawn mutates again, shaking off the only wound it has taken. I get the initiative though and wades in again. He wounds it twice and it goes down. The team breath a sigh of relief and that’s when Ivar decides to check out the pile of stuff in the corner of the room, and sets off an alarm! Suddenly two more pairs of imps appear from different directions.

I’m torn between keeping any eye on our downed comrades and exploring the level further, but Miyako points out the alarm must have attracted the last of them and volunteers to stay behind, so we can move on.
She was wrong, of course, and we go on to find first one imp alone in a room, quickly dispatched, and then three more guarding a treasure horde, two dealt with by me and Graug getting the other, before we are done with this level.
Spreet will be out for two weeks, Leonidas was close to death (Silvertree Leaf to the rescue) and will be out for five weeks! So much for a simple distraction while waiting for Dorothea to recover! On the plus side, we recovered a huge amount of loot!
Turn 27 - Leapin’ Lizards!

Faced with the choice of lurking around Skypool waiting for team mates to heal or heading off to battle, I of course chose the latter. For days now rumours had been circulating the taverns of strange beasts prowling the land around the Dark Marshes. From the descriptions they sounded like the same things we fought months ago when taking Brother Marcus back to Freefield. The latest rumour suggested they had been seen even in the Dragon Woodland, so we set off the next morning.
It was near midday before we found them, and indeed they were clearly kin of those we had fought before. It seems we saw then first, and noting they were in three groups, we split up similarly.
Unfortunately the battle did not get off to a good start for us. Miyako only stunned their leader and although Dorothea managed to distract one archer the other shot and wounded me. Thankfully things started to turn our way and three lizards went down as we got to grips with them.

I managed to get a brief respite and my Curative Harness dealt with my wound before their leader crashed into me. A group melee ensued with Graug and I against their Captain and a second lizard but we emerged victorious. Miyako bagged one archer and Erik reached the remaining archer and it was all over.

Turn 28 - Down on the Farm


I couldn’t see any archers so we took the battle to them, hoping to draw them out, which did indeed draw them close enough for us to make the first attack, though I noticed the giant snake leader seemed to be biding its time and letting its minions take the brunt. That didn’t save it though, my trusty sword blocked its every move and then I hacked off its head!
When I could draw breath, I looked around, to see the team bloodied but victorious. Sadly a search of the house turned up a scene of needless destruction and we found the partially digested bodies of the family in the barn. The fact that the livestock were still alive but the family were being used as food was truly chilling. We returned to Skypool with a burning hatred for these cruel invaders.

Turn 29 - Caravan Guards

I admit when the attack came I was unprepared. We weren’t even through Dragon Woodland yet and I wasn’t expecting trouble until near the end of our journey. We were wandering alongside the first carts and travellers and about to pass an old ruin when I spotted movement on a nearby wooded hill and then felt the pain of a crossbow bolt embedded in my side! Human troops, well armed and organised attacked! Things got bloody and fast, a nasty ruthless killer looking guy leapt out at me from the ruins and I was lucky to best him given I was already carrying a wound. Ivar was not so lucky and was down, but Dorothea summoned her leopard to keep the foe from trying to finish him off. Leonidas took out one but was soon faced with another, and Miyako wounded one.

I was between Miyako and the crossbowmen, so leapt at one of the foe and took him down, at the same time getting out of her way. Her arrow failed to hit her target but also put them off their aim. When I next had a chance to look around, Leonidas, Graug and the Leopard had also accounted for a would be robber, but then Dorothea gave warning that we had been outflanked and four more were on our left!

Miyako was torn between trying to keep the crossbowmen pinned down and dealing with the more immediate threat, but the leopard was heading for the hill so she shot down one of the new threat. I took out another as well, and it seems one of the crossbowmen had had enough and slunk away, so four left to go.

Turn 30 - Drawn to the fire, or drawn to us?

Two nights later, within a day’s ride from our destination, we were attacked again. We had pitched tents for the night and had decided to stand watch with the regular guards. The hair on the back of my neck started to tingle as a terrible howl broke the stillness of the night.

Another wolf was downed, leaving just two. Then another was down and the sixth one backed away snarling. Was it over? Apparently not! More howling rent the air and from both sides appeared yet more wolves and amongst them an even bigger black one, clearly some sort of leader! If that was enough a terrible form shaped like a wolf but walking upright then burst from one of the tents!

This second wave proved more challenging, Leonidas and another guard went down and Graug took a wound from the Werewolf.

Dorothea tried to heal Graug but her spell failed. He valiantly went back into battle with the beast and although the beast did take a wound it seemed to heal immediately! Thankfully Miyako shot the black wolf and I took out another yellow.

It took another round of fighting to kill the three remaining yellow wolves and then I waded in to the werewolf and dispatched it from behind while it was still fixated on Graug. Why that thing had been travelling with the caravan we could only guess at.
On reaching the Feral community things became clear when the elders explained that they had been under constant harassment by the reptiles, after being told to leave these lands and refusing to go. The elders suggested that trying to stop caravans reaching them was clearly part of that harassment. With Leo in need of a long recovery time, we left him with them while we returned with the caravan to Skypool to gather up Spreet and Ivar before returning to deal with this problem.
Turn 31 - Plans change!

Erik tried to outflank the camp to the left but scared a bird and got spotted, and the element of surprise was gone, but hopefully Erik would draw them in his direction to start with. It worked like a charm, the bad guys headed towards Erik, giving Miyako a clear shot at a guy with a crossbow, who she wounded, and giving Graug and I the chance to sneak closer and prepare to charge.

Graug got to the crossbow man and finished him off, I charged their leader a viscous brute of a man but he was clearly a little surprised and fell at my first strike. Their comrades came at us but Graug held his attacker off and I felled mine in a couple of hits. Two more gathered together hoping superior numbers might help, a third tried to outflank me. The last remaining marauder fired his crossbow at Erik but missed and then decided he’d seen enough and legged it! Three left, all aiming for me and I was a stationary target, this could be bad!

There was a sudden howl and our new feral companion, Felix, rounded a tent and fell upon the guy trying to flank me, that held him up. Behind me Erik leapt on the one attacking Graug and took him down. My two attackers fought well, but not well enough. Poor valiant Felix fell though before Miyako shot dead his attacker. A tougher fight than it might seem, my shield saved me once, and the speed of my well balanced bastard sword stopped two possible counterattacks.

Felix was alive but badly hurt, though it seems he was quite content that he had spoiled that guys plan to sneak up on me. Turning over the camp uncovered 6 gold, a map, and vital information outlining what the reptiles were up to. It seems the gold was payment for another raid on the Ferals and the map showed where they were to report to when they were done! Oh and after both leading the enemy on a merry dance, and rescuing Graug, young Erik finally found his place as a Hero!
Turn 32 - It must be here somewhere


Graug’s opponent parried his first strike but went down to the second. Mine went down straight away. Graug then had to face another one, but with an arrow from Spreet already in him, he went down too. With Spreet stunning one and Miyako taking out another, the sight of four of their comrades bleeding on the floor was too much for them, and I spotted two slinking off.

One simple spear thrust from Erik against the already wounded reptile and it was all over! Tucked away in a corner of the ruins was the Feral’s casket. For the first time in a while we weren’t going to have to carry a comrade off the battle field!
When we returned the casket to its rightful owners, they open it and found that as well as their own treasures was a unique enchanted item, the Thorn of Ice, which they gladly handed over to Dorothea in lieu of any payment, and we were very pleased with the deal!
Turn 33 - Back to Skypool
Turn 34 - Our Quest concludes

As we descended the steps into the crypt a strange fog started to swirl around, bouncing back the light from our torches and hampering our ability to see ahead very far. It was quiet … too quiet, like the fog was also deadening sound.

Things started off okay, until I reached the first room, but the things got bad, really bad. First I found a dead priest but then a glance to my left showed three shapes at the edge of my vision, when I looked back to the corpse more appeared from that direction, followed by a clanking noise to my left again and the corridor that way was getting incredibly crowded!

Nothing for it but to take on the closer foes to my right, so I charged at the Grim Knight leading them, I swear I got good hits on him, but he seemed no worse for it. The rest of the team barrelled into the room behind me, fighters gathering their strength, archers shooting at fish in a barrel. Only the cramped quarters saved us, the enemy was having trouble getting close enough for their numbers to count.

More combat ensued, Miyako took out a second with her bow, and I dispatched the Grim Knight. Leonidas killed one, Graugr leapt in to help but took a nasty blow from the enemy Captain, which Dorothea quickly healed. Now the enemy from the left had some room to move, the Captain took on Spreet who managed to hold him off, Leonidas and a foe traded blows and both came off blooded. Now the room was getting packed and surely other enemies were being alerted by this terrible din?!

Now we were the ones hampered by the lack of space and I could only stand by and look for an opening. Leonidas dispatched his opponent, Graug took out another, Spreet tried to fight the Captain, but was stunned for his trouble. Leonidas took another wound and was down! Another foe attacked Graug but instantly regretted that decision. The enemy Captain took on Dorothea, but fast work with her net kept him at bay and open up an opportunity for me. With my friends around me to give me aid, I bested him. Miyako shot the last and as I started to breath a sigh of relief, three more appeared!

Having realised how the cramped quarters could be used to our advantage, we let them come. Miyako and Spreet took a shot, both wounding their targets. Then Dorothea wielded the Thorn of Ice, and both dropped dead on the spot! This left just one, which I quickly took care of.

With Miyako guarding our backs and Dorothea trying to keep Leonidas alive, the rest of us headed for the centre of the crypt.

Sadly it seemed there were yet more enemies and they had the same idea!

One last push then, but we had already bested the worst of them and these three were no challenge.


Comments
Post a Comment