Other Figures
"So... the Chosen Men, eh? Well, I didn't choose you!"
I’ve wanted an excuse to paint up Richard Sharpe the Chosen Men ever since first spotting this Wargames Atlantic kit, and first I planned to use it for The Silver Bayonet, then Five Kilometres from Leipzig, then Musket to Rifle. In truth they still haven't made it to the table, maybe one day!
32 figures is way more than I need, but I rationalised it like this, I like posting photos of my games so if I made different poses of the same character I could mix things up a bit for the game reports. Makes sense to me ;-)
The box set and the rules went on my Christmas list, and Santa was kind enough to deliver, so away we go! Three days later all 32 figures were constructed (have I mentioned how much I enjoy the plastic multi-part kits?) and I’m really pleased how I managed to get not just the 8 characters looking different, but a pretty characterful mix of 32 poses.
The picture above may not look particularly interesting until you realise that none of them are actually straight off the sprue, and that’s not something you can do with metal or a resin print. The Rifles box enables 32 figures, but only has 4 different bodies, and yet with the mix of arms and heads there’s a lot of different poses available. Then on top of that, with a little imagination and work, you can push things beyond the sprue.
So first up the tools you’ll need. I really suggest investing in a decent pair of side snips for removing parts from sprues. Like these for example, but of course other brands and indeed non-branded ones are available!
Also essential are a few different shapes of mini files, like these, as even the best snips are likely to leave you with a few spurs that still need filing down.
Then there’s the glue. Yes you can use super glue and I’m sure you’ll need that anyway, but again I would suggest if you are going to do much with hard plastic, then some appropriate glue is worth the investment. I love this stuff, it pretty much welds two pieces of hard plastic together but is tacky swiftly (so you don’t have to hold bits together while they dry) and yet still allows a little movement (to get the positioning just right) and can even be detached completely by adding more of the same glue (which will dissolve the original bond and allow starting again if you don’t wait too long).
Finally, there are often small gaps in joins and especially if you start pushing things to use arms in ways the original designer may not have had in mind ;-) so you need some sort of gap filler. I cam across this stuff and find it very easy to use. The thin nozzle allows easy application along a join, and the stuff itself can be easily smoother with a index finger (not required to be purchased separately, hurrah!). I do find the nozzle needs poking through each time, so a needle will come in handy.
With these tools to hand I think you’ll find getting from sprue to figure pretty straightforward.
I assemble onto the base I’m going to use, and prime the whole thing, then it’s on to painting. I use a white matt primer (Rust-Oleum for me) as it works well with Army Painter Speedpaints (my favourites but other people have their own of course). I’ve read all about Zenithal and ‘Slap Chop’ and frankly I can’t be bothered! With Speedpaint I've seen people talking about starting with lighter colours and working through to darker ones, but I find I’m having to go back and tough up anyway so sometimes I do but often I dive into the main colour without being too careful and then tidy up with normal acrylic white (Army Painter Fanatic).
I work in batches, so I can do a single colour on a few figures, then move on to another colour, rather than trying to do one figure at a time. I don’t add everything to the model straight away if I think it will make the painting too difficult, things like backpacks, quivers, scabbards, and other slung weapons get painted separately and glued on before varnishing. Then I black in the base before varnishing (Rust-Oleum Matt for me). Finally I base with a light green scatter by painting on some PVA glue, throwing some on, and then tapping the figure to make the excess come off.
Final step is to add some 6mm grass tufts, tiny rocks, or little bits of twig, just for ‘interest’. So there we go. Now back to why I bother with all this. Here’s the sprue for Riflemen, note three complete bodies and one set of legs which the only captain torso can go on.
My plan for TSSB is to do eight characters each in four poses, with the limited bodies above this then has lead me to having a real play with the options.
Take a look at the four variants of Pat Harper above and the variants of Captain Sharpe below. The kneeling Sharpe is the same body as Harper, but by cutting off the torso I could make the Captain torso fit quite nicely. I also managed to cut down one of those torso parts to leave just the pelisse (jacket) behind to throw at the feet of another Sharpe pose. Oh and that Sword, everyone knows that Sharpe has a straight bladed heavy cavalry sword, not the curved sabre on the sprue, my only change not using the sprue parts.
Now look again at the rifleman further up the page in the classic pose with the rifle steadied on his foot. That is the same legs and body as Harper standing firing rifle, modified and filled to make the body shape work and both arms needed a little extra length, not to mention a cut-and-shut rifle to make it long enough to rest on his boot.
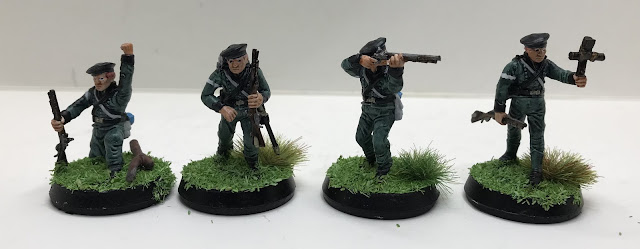
Anyway, here's how the rest turned out, starting with Chosen Man Harris, a “courtier to my lord Bacchus”: The homemade cross clearly a nod to The Silver Bayonet.
Chosen Man Daniel Hagman, crack-shot Rifleman: There's that pose.
Chosen Man Francis Cooper, a bit handy with a picklock, and always on the lookout:
Rifleman Isiah Tongue:
Last is Tobias Moore with his mutton chops:
Great fun!
Post Apocalypse
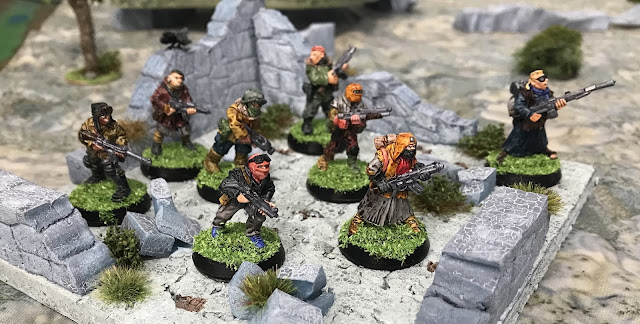
Another genre that I have been messing about with is a non-zombie post apocalypse survivours kind of thing.
These were built from the SAS sprues in the starter set of 0200 Hours from Grey for Now Games, also available as a box set from Wargames Atlantic. I gave them all the same camouflage jacket (my own version of Lizard Pattern) but then a mix of trousers and gear painting to highlight their slightly rag-tag nature. Bases are labelled in line with my character naming convention so I can keep track of who is carrying what.
Back to human enemies. These are from Spectre and are supposed to be a heist gang in balaclavas, but my mind came up with “When Luchadores go bad!” instead.
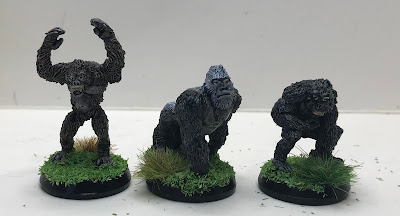
Then a couple of “Monstrosities”, one from the forest and one from the swamp, plus a giant Scorpion (metals from various North Star ranges).
I bought some plastic lengths of scaled down I and H beams to make some ruins and, while experimenting with painting it as ‘rusted’, made some markers.
Next up, I had a play with the Wargames Atlantic Harvesters kit. My poor head couldn't cope with four-legged bugs, but thankfully there is in plenty of stuff on the sprues to go to six legs instead.

I also did these mutant carnivorous plants, because they were fun to do!
Here are the poor Bystanders, from the Wargames Atlantic Survivours kit.
Science Fiction - On the Space Station
Given that the first of my own games (Call Security!) is set on a space station, I needed quite a variety of sci-fi figures and that headed me down the route of the various other Stargrave plastic kits.
First up were Troopers painted up as my Security Officers.
Then another two sprues of Scavengers as the hapless Bystanders
Then a sprue of each of the two Stargrave Crew sets made these Adversaries with slug thrower weapons.
A bunch of robots from Headbunny Games ready to be terrain or for the optional rules for Robot Bystanders.
Also as Adversaries we have Stargrave Automatons, Mercenaries, and more Scavengers. Plus a couple of metal Psionics.
Then it was down to just the last of the Scavengers to fill in gaps in the Adversary list - civilians with improvised weapons, and few guns and the finally another set of aliens.
Pirates
Ahead of the release of Plunder and Fighting, I needed some pirates, and it turned out that North Star were a great one-stop shop to get me going.
First up is our swashbuckling Crew, these are a mix of Copplestone and Artizan metal.
The rest of the Ghost Archipelago plastics then made up the rest of these Adversaries, including the use of the North Star add-on kit with tricorn heads and flintlock pistols.
Followed by the group shot, everything you need for a 15 game campaign of Plunder and Fighting, well more than you need really but I couldn’t help myself!
Next up are the figures for Join the Posse!
My first step was figures that could serve as either the posse or as outlaws so I went for Great Escape Games and their range for Dead Man’s Hand. First the box set of metal figures called the Lawmen, and then the plastic set of Gunfighters.
More Science Fiction
Oh boy, so having based a whole load of figures specifically for Call Security, when I got going with We need your best squad I needed a bunch more! I wasn’t going to pass up an opportunity to have more fun with plastic kits!
First up was a straightforward build though for the main squad, Stargrave Mercenary bodies this time, but the Squad specialists are in the first group - leader, psionic, sniper, heavy, and scout.
With five basic troopers.
But for the first Adversary types I took a sprue of each of the three different Frostgrave cultists available at the time and added Stargrave arms. I hope you agree this makes for a very interesting looking bunch.


Comments
Post a Comment